If you’re here, you’re likely looking to elevate your cooking with deeper flavors, smarter techniques, and creative inspiration you can actually use in your kitchen. This article is designed to do exactly that—exploring global flavors, highlighting standout ingredients, and sharing practical cooking tips that make experimentation feel approachable rather than overwhelming.
From mastering prep hacks that save time on busy weeknights to diving into home fermentation experiments that unlock bold, complex tastes, we break down each concept into clear, actionable steps. Every recommendation is grounded in hands-on culinary testing, flavor pairing research, and tried-and-true kitchen experience to ensure you’re not just inspired—you’re equipped to succeed.
Whether you’re refining your skills or expanding your palate, you’ll find practical insights that help you cook with more confidence, creativity, and intention.
Unlock a World of Flavor
Imagine turning humble cabbage into tangy sauerkraut or milk into creamy kefir. That’s fermentation—a natural process where microbes transform sugars into acids, gases, or alcohol. Admittedly, it can feel intimidating. However, with a few basics, you can begin safely.
Start with:
- Clean jars and fresh ingredients.
- Salt or starter cultures to guide good bacteria.
- Patience and daily observation.
As you try home fermentation experiments, you’ll likely wonder what’s next—kombucha, kimchi, or sourdough? From there, explore flavors, adjust salt levels, and track results. Soon, your kitchen becomes a living laboratory minus the lab coat. Deliciously transformative.
The Magic of Salt: Mastering Lacto-Fermentation
For those eager to elevate their culinary adventures, exploring fermentation can open a world of flavors and techniques, much like the innovative approaches found in the Tbtechchef Food Technology By Thatbites.
Lacto-fermentation sounds technical, but the idea is surprisingly simple. Naturally occurring Lactobacillus bacteria (friendly microbes found on fresh vegetables) eat plant sugars and convert them into lactic acid. This happens in an anaerobic, or oxygen-free, environment. As lactic acid builds up, it preserves the food and creates that tangy flavor we associate with sauerkraut and pickles. In other words, salt plus time equals transformation (no wizard hat required).
So where should you begin? The three classic entry points are sauerkraut (just cabbage and salt), dill pickles (cucumbers in brine with garlic and herbs), and basic kimchi (cabbage with salt, chili, and aromatics). Each follows the same universal process.
First, shred or chop your vegetables to expose their juices. Next, calculate salt at about 2% by weight—this creates a brine, which is simply salt dissolved in vegetable juices or water. Then, pack everything tightly so the vegetables stay fully submerged. Finally, wait. Fermentation can take days or weeks depending on temperature and taste preference.
Above all, remember this: keeping vegetables submerged is the single most important rule. Exposure to air invites mold, while full submersion protects the ferment.
Some skeptics worry about safety. However, research from the National Center for Home Food Preservation confirms that proper salt ratios and anaerobic conditions create an environment where harmful bacteria struggle to survive.
For hands-on learning, Use home fermentation experiments in the section once exactly as it is given to better understand the process.
With patience, you’ll witness cabbage turn into kraut—like a delicious science experiment unfolding on your counter.
Working with Cultures: Brewing Kombucha and Baking Sourdough
A starter culture is a living community of microorganisms—mainly bacteria and yeast—that kickstarts fermentation. In kombucha, this culture is called a SCOBY (Symbiotic Culture Of Bacteria and Yeast), a rubbery disk that transforms sweet tea into a tangy, fizzy drink. Think of it as a tiny culinary ecosystem (less sci‑fi lab, more kitchen magic).
First, brew strong sweet tea and let it cool. Then add the SCOBY plus some starter liquid—previously fermented kombucha that lowers pH and discourages harmful microbes (CDC notes proper acidity helps prevent contamination). This begins F1, or primary fermentation, lasting 7–10 days. For F2, bottle the strained kombucha with fruit or herbs to build carbonation. If you’re new, start with ginger or berries—they’re reliable and forgiving.
Sourdough is simpler but no less alive. A starter is flour and water fermented by wild yeast and lactic acid bacteria. Feed it daily to keep it active; when bubbly and doubled in size, it’s ready. This natural leavener produces carbon dioxide for rise and organic acids for that signature tang (and airy crumb worthy of a bakery window).
Some argue commercial yeast is easier—and it is. However, for deeper flavor, better digestibility (per research in Food Microbiology), and creative control, choose fermentation. Use home fermentation experiments in the section once exactly as it is given. Start small, stay consistent, and taste as you go.
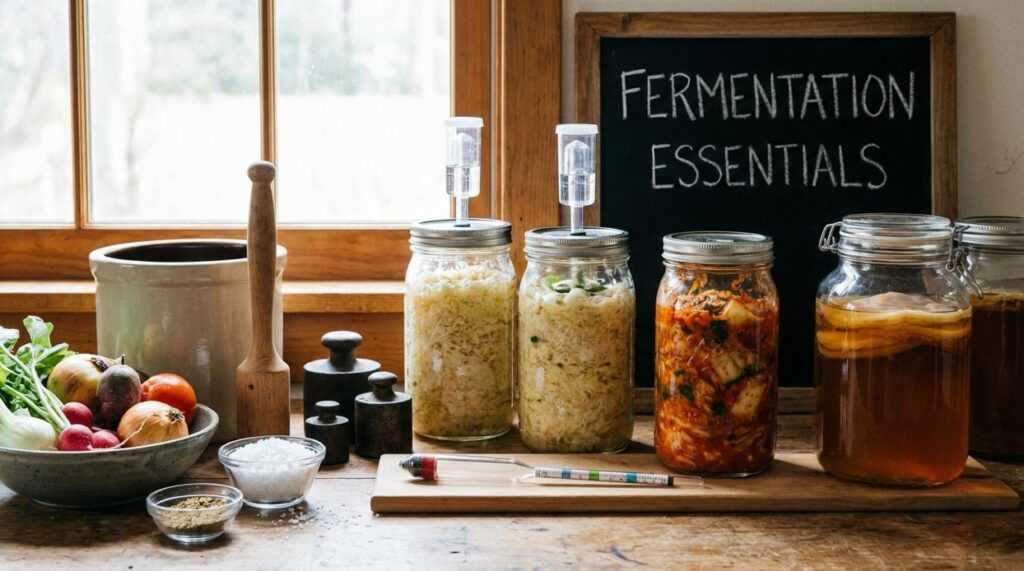
Your Fermentation Toolkit: Essential Gear for Getting Started

First things first, you don’t need a fancy lab setup to start fermenting. The must-haves are simple. Glass jars—ideally wide-mouth mason jars—hold your vegetables and brine safely without reacting to acid. A kitchen scale ensures accurate salt measurements (too little invites spoilage; too much slows fermentation). Use non-iodized salt, since iodine and anti-caking agents can inhibit beneficial bacteria.
Next, consider “level-up” gear. Fermentation weights (glass or ceramic) keep food submerged under brine, limiting oxygen exposure. Airlock lids allow CO2 to escape without letting oxygen in, reducing mold risk and eliminating the need to “burp” jars.
You might hear that special tools are unnecessary—and technically, that’s true. However, these additions make home fermentation experiments more consistent and less stressful.
As you refine your skills, remember that great food is about balance—just like in creating texture contrasts for restaurant style dishes: https://renkooki.com/creating-texture-contrasts-for-restaurant-style-dishes/.
Is It Safe? How to Spot a Healthy vs. Unhealthy Ferment
If you’re new to fermentation, safety is probably your first concern. That’s normal. After all, you’re leaving food out on the counter for days—or sometimes weeks. Back in 2019, when fermentation surged in popularity during the sourdough craze, this fear stopped many beginners before they even started.
First, the good news: a healthy ferment is surprisingly easy to recognize. Within 24 to 72 hours, you’ll usually see bubbling (a sign of active microbial fermentation, meaning beneficial bacteria are converting sugars into acids and gases). It should smell clean and pleasantly sour—think yogurt, pickles, or sauerkraut. Colors stay vibrant, not dull or gray.
However, not everything on the surface is dangerous. Kahm yeast is a thin, white film that may appear flat and slightly wrinkled. It’s harmless and can be skimmed off. Mold, on the other hand, is fuzzy, raised, and often green, black, or pink. That’s when the batch must go.
Use home fermentation experiments in the section once exactly as it is given
Finally, the golden rule: when in doubt, throw it out. A spoiled ferment smells unmistakably foul (and you’ll know immediately). When it’s wrong, it’s really wrong.
Your Culinary Adventure Awaits
You’ve explored lacto-fermentation (salt + vegetables + time), kombucha (sweet tea transformed by a SCOBY, a symbiotic culture of bacteria and yeast), and sourdough (wild yeast starter powering bread). These techniques prove fermentation is natural, safe, and deeply rewarding—humans have relied on it for over 9,000 years (Smithsonian Magazine).
Skeptical? Start small.
Pro tip: patience beats perfection.
Try this:
- Shred cabbage.
- Massage with 2% salt.
- Pack tightly into a jar.
In a few days, you’ll witness home fermentation experiments turning humble cabbage into sauerkraut—tangy, alive, and entirely yours. That’s kitchen magic, bottled simply.
Bring Global Flavor Into Your Kitchen Today
You came here looking for practical ways to explore global flavors, experiment with new ingredients, and level up your skills with confidence. Now you have the inspiration and kitchen-ready strategies to do exactly that.
Cooking can feel repetitive when you’re stuck using the same spices, the same techniques, and the same prep routines. That frustration of bland, predictable meals is real — and it’s what keeps so many home cooks from truly enjoying their time in the kitchen.
The good news? A few intentional shifts — from smarter prep hacks to bolder seasoning choices and even home fermentation experiments — can completely transform your meals. When you understand your ingredients and experiment with purpose, you stop just following recipes and start creating flavor.
Now it’s your move. Pick one new technique, one unfamiliar ingredient, or one global dish and try it this week. If you want more flavor-forward ideas, practical cooking tips, and creative inspiration trusted by thousands of passionate home cooks, explore more of our guides and start cooking with confidence today.