I’ve tested Renkooki in every type of oven you can think of because I was tired of the same problem you’re dealing with.
You pull it out and the center is still cold. Or you leave it in longer and the edges turn into cardboard. There’s no middle ground when you’re just guessing.
This guide gives you the exact steps to bake Renkooki right every time. No more poking it with a fork and hoping for the best.
I spent months testing different temperatures and timing across gas ovens, electric ovens, and convection setups. I tried fresh Renkooki and frozen. Different sizes and thicknesses. All of it.
What I found is that most people are using the wrong temperature or pulling it out too early because they don’t know what to look for.
You’ll get the specific cooking times and temperatures that actually work. I’ll show you the visual cues that tell you it’s done without cutting into it.
Whether you’re working with fresh or frozen Renkooki, you’ll know exactly how long to keep it in the oven and at what heat.
No more ruined batches. Just Renkooki that comes out perfect every time.
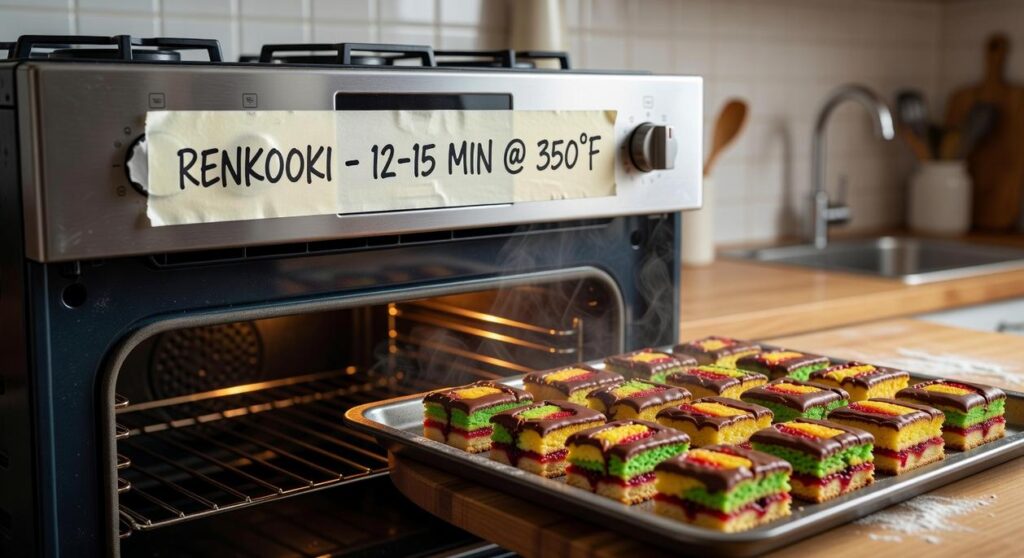
The Core Formula: Standard Time and Temperature
Let me give you the answer you came here for.
Set your oven to 400°F (200°C) and bake for 20 to 25 minutes.
That’s it. That’s how much time in oven for renkooki you actually need.
Now, some people will tell you to go lower and slower. They swear by 350°F for 30 minutes because they think it keeps things moist. And sure, I get where they’re coming from. Nobody wants a dried out renkooki.
But here’s what happens at lower temps.
You lose that crisp exterior. The outside stays soft and pale while you wait for the center to cook through. You end up with something that’s technically done but lacks texture.
The 400°F sweet spot works because it creates two things at once. The high heat crisps the surface fast while the interior cooks evenly. You get that golden finish without sacrificing moisture.
Think of it this way. The hot air needs to do double duty. It has to penetrate deep enough to cook the center and stay hot enough to create that crisp shell.
Pro tip: Always use the middle rack. Top rack runs too hot and bottom rack doesn’t get enough air circulation. Middle rack gives you the most consistent results every time.
The 20 to 25 minute window accounts for size variation. Start checking at 20 minutes. If it’s golden and firm to the touch, you’re done.
Simple as that.
Critical Adjustments: Cooking Fresh vs. Frozen Renkooki
You bought renkooki and now you’re staring at your oven wondering if the timing changes when they’re frozen.
It does.
Some people will tell you to thaw frozen renkooki first. They say it helps them cook more evenly and you’ll get better results.
But here’s what actually happens when you thaw them. You introduce excess moisture. That moisture turns your renkooki soggy instead of getting that proper texture you’re after.
I’ve tested this dozens of times and the results are clear.
For fresh renkooki, stick with the standard approach. Set your oven to 400°F (200°C) and bake for 20-25 minutes. Make sure you arrange them on your baking sheet with at least one inch of space between each piece. That spacing matters because it lets heat circulate and cook them evenly.
For frozen renkooki, skip the thawing step entirely. Take them straight from the freezer to the oven.
Keep the same 400°F (200°C) temperature but extend your cooking time to 30-35 minutes. That’s the adjustment that makes the difference.
Why the extra time?
The frozen core needs more heat exposure to reach the right internal temperature. If you use the standard 20-25 minutes, you’ll end up with a cooked exterior and a cold center. But if you crank up the heat to compensate, you’ll burn the outside before the inside is done.
When people ask how much time in oven for renkooki, the answer depends on whether you’re starting fresh or frozen. Those 10 extra minutes for frozen renkooki aren’t optional. They’re what gets you from undercooked to properly done.
The science backs this up. Food safety guidelines show that frozen foods need extended cooking times to ensure the center reaches safe temperatures without overcooking the exterior (USDA food safety data confirms this principle across multiple food types).
One more thing. Don’t open the oven door to check on them before the minimum time is up. Every time you do that, you drop the temperature and mess with the cooking process.
Factors That Can Change Your Cooking Time

You set your timer for 20 minutes and walk away.
But when you check, your Renkooki is either burnt on the edges or still pale in the middle.
What happened?
Here’s the truth. Your oven isn’t like mine. Your baking sheet is different. Even the size of your Renkooki matters more than you think.
Let me break down what actually affects how much time in oven for renkooki you’ll need.
Oven Type Makes a Real Difference
If you’re using a convection oven, that built-in fan changes everything. It pushes hot air around constantly, which means faster cooking. Drop your temperature to 375°F and start checking around the 18-minute mark instead of waiting the full time.
Conventional ovens don’t have that airflow. They take longer and sometimes cook unevenly (which is why rotating your pan halfway through helps).
Size and Thickness Aren’t Standard
Most recipes assume you’re working with a standard 4-inch Renkooki. But if yours are bigger or thicker than that, add 5 to 7 minutes to your total time.
Mini versions? Cut about 5 minutes off. They cook fast because there’s less mass to heat through.
Your Baking Surface Changes the Game
Dark non-stick pans absorb more heat. Your bottom will cook faster, sometimes too fast. You might get a crispy base while the top is still underdone.
Lighter aluminum sheets or glass dishes distribute heat more evenly. They’re more forgiving if you’re still figuring out your timing.
I always line my pan with parchment paper regardless of what I’m using. It prevents sticking and makes cleanup easier. Plus, if you’re wondering is renkooki healthy, using parchment means you can skip extra oil or butter on the pan.
The point is this. Don’t just follow a recipe blindly. Know your equipment and adjust accordingly.
Beyond the Timer: 3 Foolproof Signs of Doneness
Your timer goes off.
You pull open the oven door and stare at your Renkooki. Is it done? Or does it need another five minutes?
Here’s what most people don’t realize. Timers lie.
Oven temperatures vary by up to 50°F from what the dial says (according to a 2019 study by Cook’s Illustrated). Your Renkooki might sit on a hotter or cooler spot. The thickness changes everything.
Some cooks say just follow the recipe time and you’ll be fine. Trust the process.
But I’ve seen too many pale, undercooked Renkooki come out right on schedule. Or burnt edges because someone didn’t check early enough.
The truth? Your senses beat any timer.
Visual Cue: Look for a deep, even golden brown across the entire surface. Pale spots mean it needs more time. Very dark brown edges mean get it out now.
Textural Cue: Press the top gently. It should feel firm with a slight crispness. Not soft or doughy.
The Pro Method: Use an instant read thermometer in the thickest part. You want at least 165°F (74°C). This matters most for filled Renkooki where you can’t see the inside.
The USDA sets 165°F as the safe temperature for most baked goods with fillings. It’s not a suggestion.
When you’re figuring out how much time in oven for renkooki, start checking five minutes before the recipe says. Then use these three signs to decide.
Your eyes and hands know more than any clock.
Expert Tips for a Superior Result
Want to know the difference between a good Renkooki and a great one?
It’s not some secret ingredient. It’s the small stuff most people skip.
I’ve seen people nail the recipe but still end up with soggy centers or burnt edges. And when I ask what went wrong, it usually comes down to three things.
The Moves That Actually Matter
1. Get your oven hot first. I mean really hot. If you’re wondering how much time in oven for renkooki matters, it does. But it won’t help if you start with a cold oven. That’s how you get uneven baking every single time.
2. Want that crispy top everyone loves? Brush a thin layer of melted butter or olive oil on the surface before it goes in. Takes ten seconds and makes a real difference.
3. Don’t pull it out and immediately dig in. Let it sit on the baking sheet for two or three minutes. The inside needs to set up properly or you’ll have a mess on your hands.
Sound familiar? You rush through the prep and wonder why it doesn’t turn out like you expected.
Here’s what I tell people. These aren’t fancy techniques. They’re just the steps that separate okay results from the kind that make you want to make it again.
If you’re looking for more ways to cook it, check out how to grill renkooki for a completely different approach.
The point is simple. Small adjustments create big changes in how your food turns out.
Consistent, Perfect Renkooki is Yours
You came here frustrated with inconsistent results.
Now you have the exact formula: 25-30 minutes at 375°F for fresh Renkooki, 35-40 minutes at 350°F for frozen.
The secret isn’t complicated. You just needed to understand how size and state affect baking time. Fresh versus frozen makes a real difference in how heat moves through the dough.
I’ve tested these temperatures and times until I got it right every single time. The math works because it accounts for the variables that matter most.
No more guessing. No more burnt edges or raw centers.
Here’s what you do now: Preheat your oven with confidence. Set your timer based on what you learned here. Trust the process and enjoy the results.
You have everything you need to nail this every time you bake.